by jphilo | Dec 8, 2021 | Recipes

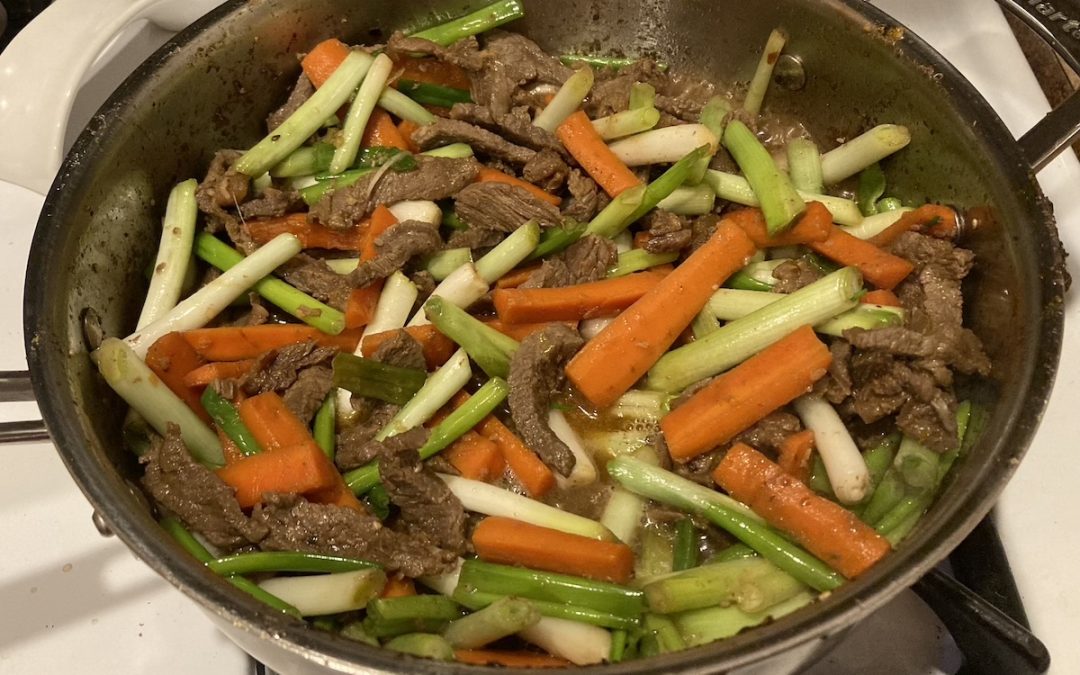
Mongolian beef is one of my husband’s favorite dishes. When I brought home our local grocery store’s seasonal magazine and saw a recipe for Mongolian beef made with hamburger. I decided to adapt it to meet our multigenerational family’s purposes. That meant:
- Supplementing the traditional green onions with vegetables (carrots) the grandkids will put in their mouths.
- Using beef that hasn’t been ground.
- Doubling the recipe so 4 adults and 2 children could get enough to eat.
Here’s our adjusted recipe.
Mongolian Beef
2 pounds lean beef (roast or steak) cut into thin strips
3 T sesame oil, divided
6 cloves garlic, minced or pressed
1 T fresh garlic, grated
4 T mirin (rice wine)
4 T rice vinegar
1 T brown sugar
1/4 cup soy sauce
1/2 cup water
2 tsp. sesame seeds
1/4 tsp. crushed red pepper flakes
4 bunches green onions cut into 2 inch lengths
2 large carrots peeled and cut into bite-sized pieces (skip this ingredient if you want a more traditional dish)
2 T toasted sesame seeds (for garnish)
8 cups cooked rice
Put 2 tablespoons of sesame oil into a large pan set at medium high heat. Add beef strips and cook through and juices have been cooked off. Remove from pan. Add remaining tablespoon of oil. Add carrots and stir fry until they just begin to cook. Add garlic and ginger. Saute until fragrant, about 2 minutes. Add the mirin, rice vinegar, brown sugar, soy sauce, and water. Cook until liquid begins to thicken. Add green onions and stir fry for another minute or 2. Serve over rice and sprinkle with toasted sesame seeds.
Editorial Note: The 6-year-old wouldn’t eat the carrots because he said they tasted weird. He refused to eat the meat at first because he thought it looked like poop. (6-year-olds are obsessed with poop.) Once convinced it wasn’t poop, he tasted and downed it in record time.) The 3-year-old ate the carrots and rice, but not the meat. They ate the green peas I prepared as a back up vegetable. Why they didn’t refuse those because “pea” and “pee” sound the same, I’ll never know.
by jphilo | Mar 2, 2021 | Recipes

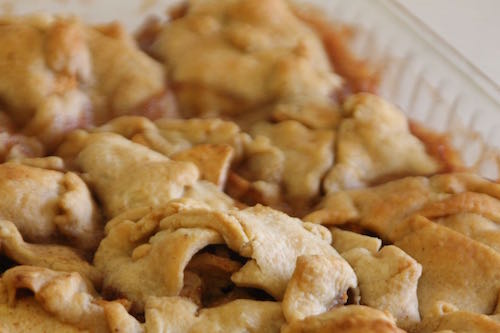
Mom’s apple dumplings (as in author Jolene Philo’s mom and not fictional protagonist Jane Newell’s mom) were mouthwateringly good. My mom learned how to make them from her mother, who made them in a huge, metal dishpan to feed her large family. Neither Mom or her mom used a recipe. At some point in my adulthood I badgered Mom into writing out a recipe so I could make them for our kids. They loved them.
So much so that last Saturday my adult daughter Anne said she was craving apple dumplings. She asked where to find the recipe. I pointed her to the electronic version from a 2015 post at this website. She made them Saturday evening, and she served them for dessert after Sunday dinner. They were eagerly devoured by all. My heart was as full as as my stomach as I watched my grandchildren (ages 5 and 3) become fans of Mom’s apple dumplings. Once Mom can come visit again, Anne and I will make a batch for her to enjoy with us. I think she’ll like seeing an old tradition being embraced by a new generation.
Mom’s Apple Dumplings
Step 1: Make a batch of Grandma Conrad’s Never Fail Pie Crust. Let it sit for at least 10 minutes.
Step 2: In a saucepan, combine 2 cups water, 1/2 cup sugar, 3 tablespoons butter (or Earth Balance Vegan Stick for a non-dairy version), and 1/4 teaspoon cinnamon. Bring to a rolling boil. Remove from heat and set aside.
Step 3: Peel, core, and slice 6–8 cups of apples. Put them in a large mixing bowl. Add 1/4 cup of sugar and 1 1/2 teaspoons cinnamon. Mix together until apples are coated with sugar and cinnamon.
Step 4: Preheat the oven to 425 degrees. Take 1/4 of the pie dough and roll it into a rectangle about 15 inches long and 8 inches wide.
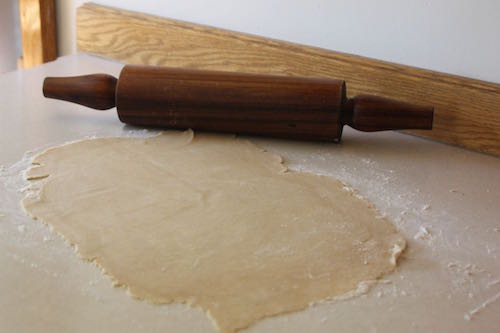 With a paring knife, cut the dough into 6 pieces.
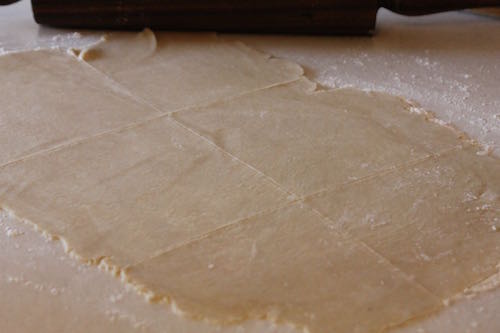 Fill each section of dough with as much of the apple mixture as it can hold.
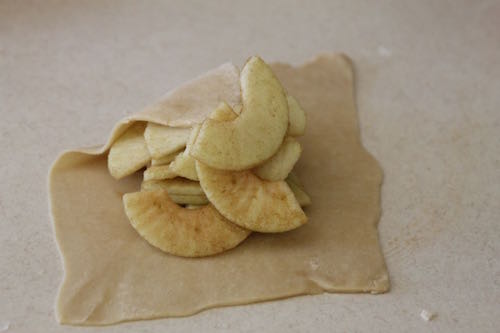 Fold the dough up and around the apples.
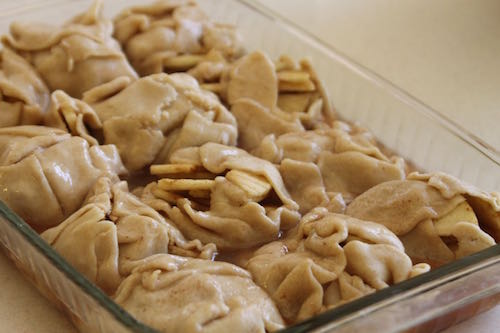
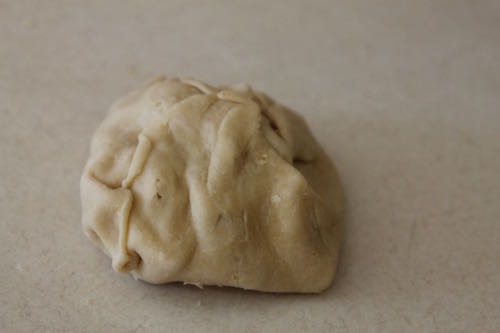 Place 12 dumplings in a 9 x 13 inch baking pan. Pour the syrup over the dumplings.
 Bake the dumplings at 425 degrees for 15 minutes. Turn the oven down to 350 degrees. Continue baking for 30–35 minutes until the apples are soft when a fork is inserted into one of the dumplings.
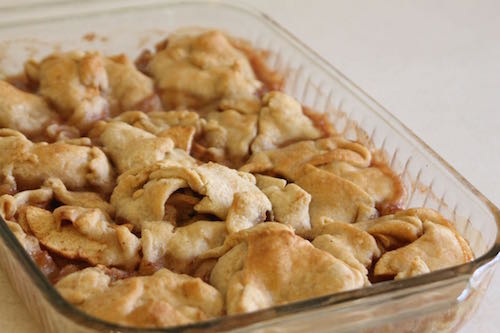
Cool and serve with ice cream, milk, or half-and-half or dairy-free alternatives.
Sign up to receive website updates and See Jane Run! book news on Gravel Road’s home page right under the picture of–you guessed it–the gravel road.
by jphilo | Jan 20, 2021 | Recipes

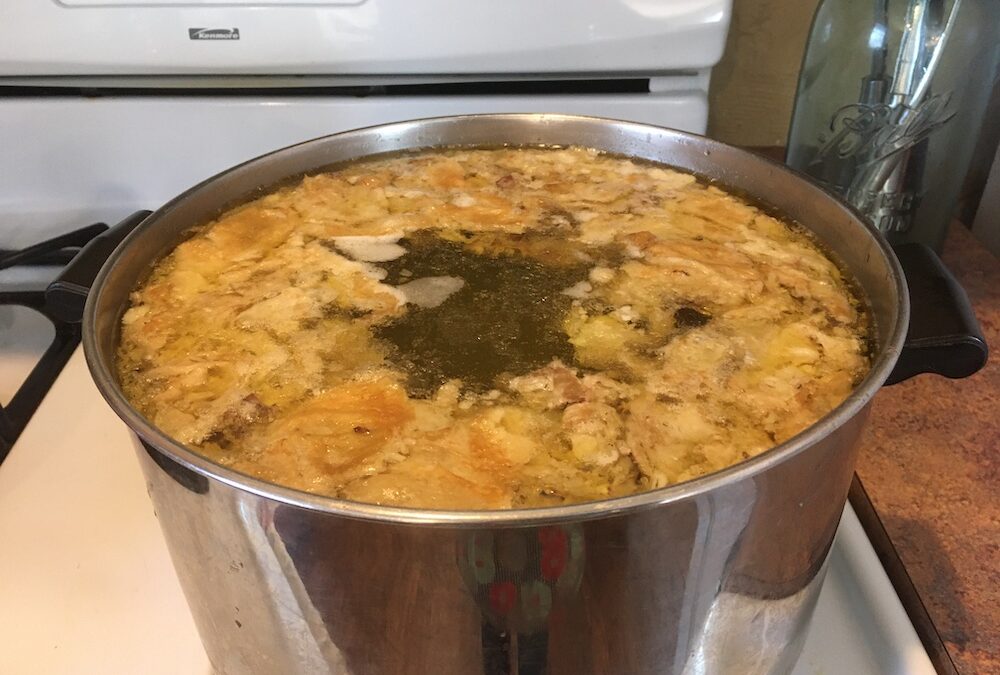
Bone broth is a new fancy, schmancy name for what I’ve been making for years. I first made it in the late 1970s after we moved to Harding County. Only we didn’t use the now trendy term “bone broth.” If we boiled a chicken or turkey carcass in a pot of water for a couple hours, we called it chicken broth. Or turkey broth. If we did the same with beef bones or ham bones, we called it beef broth. Or ham broth.
This morning, I made chicken broth. Not bone broth. The sight and smell of the pot bubbling on the stove reminded me of the Harding Country values that blessed my kitchen during our 7 years living there and for the 36 years since we left.
- Use what you have because “running” to the grocery store is a pain when the grocery store 23 miles away.
- Refuse to throw away something that looks like garbage (like bones) until after every bit of goodness has been eked out of it.
- Homemade is best.
- A deep freeze is your friend.
- So make lots of whatever you’re making and freeze it.
- In winter the great outdoors makes a good freezer, too. (Which explains while several jars of broth are cooling on the front porch before they go in the deep freeze.)

While the broth cools, I’m brainstorming ideas about how to incorporate those cooking lessons into future books in the West River Mystery series. More than the recipe included at the end of each one. Something integral to the cozy mystery being solved. Because in kitchen values are worth passing along. Because there will be no pressure to use the phrase “bone broth” since no one in protagonist Jane’s world would use such a pretentious term. And because See Jane Cook! is a really good title.
Sign up to receive website updates and See Jane Run! book news on Gravel Road’s home page right under the picture of–you guessed it–the gravel road.
by jphilo | Dec 16, 2020 | Recipes
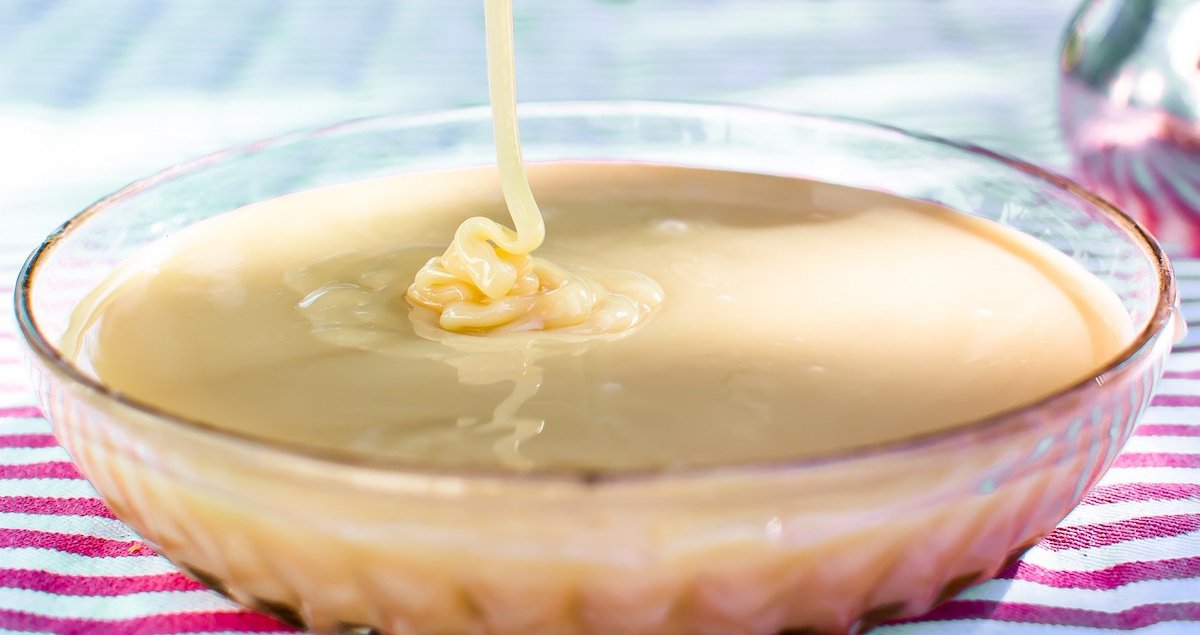
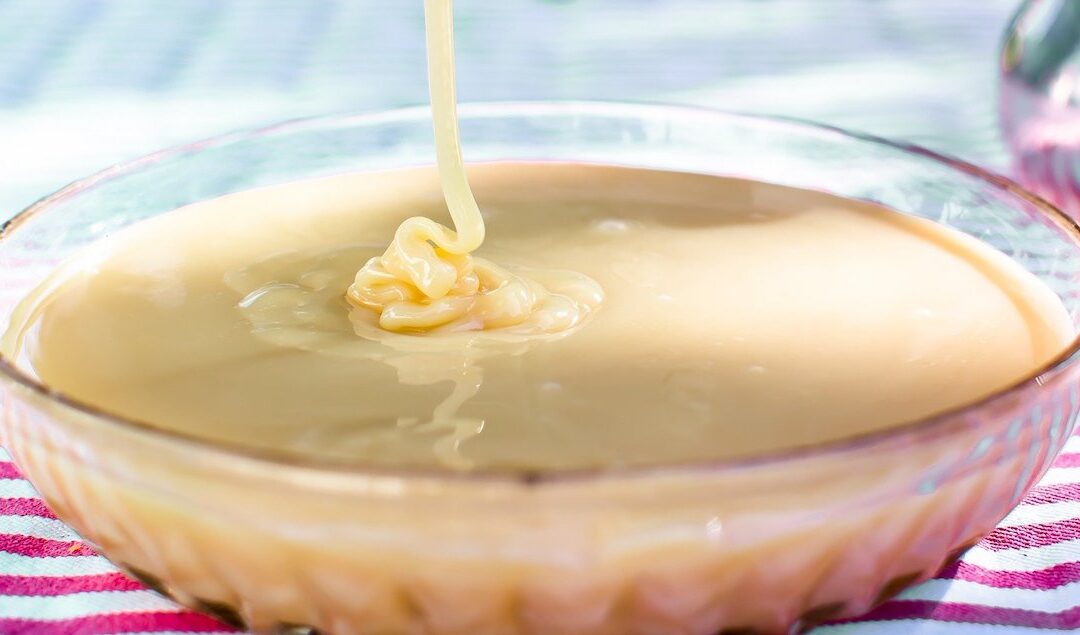
Christmas baking and sweetened condensed milk are a dynamic duo for six weeks during the holidays. However, this combination can lead to problems for those who live in rural areas.
I became acquainted with some of those problems during the first fall we lived 23 miles from the closest grocery store and 70 miles from a full service supermarket. Some of those problems were, and perhaps still are:
- Thinking far enough ahead to add sweetened condensed milk to the shopping list you’re making for the October trip to the big city* because you’re pretty darn proud of yourself for remembering to write down Halloween candy.
- Realizing, once you get back home, that you should have tripled the number of cans needed for Christmas baking so there are enough for the recipes you will inevitably forget to consult.
- Having the October shopping trip postponed on account of winter weather making an early appearance. Which means that in the future Halloween candy and sweetened condensed milk should be on July shopping lists, right under watermelon and sweet corn.
I never had enough sweetened condensed milk for Christmas baking. So finding Sylvia Padden’s recipe for a substitute version in the Camp Crook Centennial Cook Book felt like the best Christmas present ever. For some reason, stocking the pantry with powdered milk was never a problem. And even though powdered milk isn’t known for deliciousness, Christmas baking and sweetened condensed milk aren’t affected by its taste.
Condensed Milk Substitute
3/4 cup sugar
1/2 cup hot water
1 cup + 2 tablespoons powdered milk
Dissolve sugar in hot water. Thoroughly mix in in powdered milk. Let cool 5-10 minutes before using.
*For citizens of towns with less than 100 residents, communities with populations greater than 1000 qualify as “big cities.”
Sign up to receive website updates and See Jane Run! book news on Gravel Road’s home page right under the picture of–you guessed it–the gravel road.

by jphilo | Oct 21, 2020 | Recipes

Winter is not all bad. That was my mantra a couple days ago when a surprise storm dumped 9 inches of snow on our town in a few hours. It was very pretty coming down (good news) and half of it had melted by evening (even better news). If all snowstorms were like that, I’d be a big fan.
Winter is my least favorite season. My reasons begin with cold and dark and snow. They end with 25 years teaching elementary school, during which I spent 4-5 months of every year supervising kids who at least 6 times a day were either putting on or taking off hats, scarves, mittens, snow pants, coats, and boots.
However, winter is not all bad. Kind of like fictional characters, who need to be a mixture of good and bad, like real people. For instance, the protagonist of See Jane Run! has good characteristics such as caring for kids and seeking justice by catching the bad guy. And the bad guy, who shall remain nameless, is bad. But not all bad. He reinvented himself after a bad break. And he’s a good listener.
But what, you may be wondering, is good about winter? The answer is soup. By my way of thinking, soup season begins with the first snow, so this year’s soup season will be longer than usual. To celebrate this goodness, here are links to my favorite soup and stew recipes. Except for Mom’s Chili, they entered my recipe bank after we moved to Iowa.
- Mom’s Chili
- French Stew
- Minestrone
- Crock Pot Bean Soup
- Slow Cooker Chicken Thai Soup
- Turkey Tortilla Soup
Do you have a favorite soup or stew recipe? Please share it in the comments below and leave a link to the recipe if you can.
Sign up to receive website updates and See Jane Run! book news on Gravel Road’s home page right under the picture of–you guessed it–the gravel road.

by jphilo | Sep 23, 2020 | Recipes

During our years in Harding County, South Dakota, I added 2 cook books to what was a meager collection. The first was the Camp Crook Centennial Cook Book. which I purchased after it came out in 1982. The second, the Better Homes and Gardens All-Time Favorites that was published in 1979, was a gift from my mother-in-law Elsie Philo. Anyone who knew Elsie for more than ten minutes knows that she didn’t like to cook. At all. However she knew I loved to cook, so I received her gift with heartfelt gratitude.
Many of the recipes were on the fancy side, requiring either ingredients small grocery stores didn’t carry or preparation time beyond my limited supply as a country school teacher and mother to a toddler with significant medical needs. But I have used the basic sweet dough recipe found on page 380 for almost 40 years, and it’s the reason for the cook book’s worn cover. This past weekend, I made caramel rolls using the basic sweet roll recipe as I have always done on one fall Saturday or another as the weather turns cool.
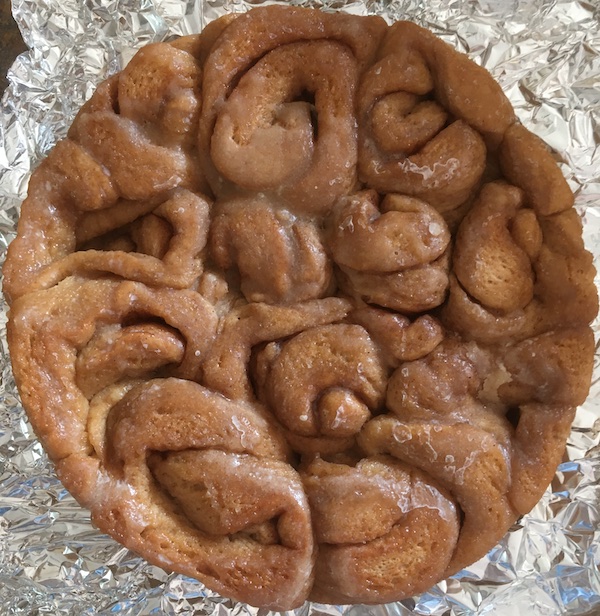
I made 2 double batches of the recipe below and baked them in pans of 12 rolls each. Our freezer now holds 7 foil-wrapped packages and our collective stomachs (Hiram, our daughter, our-son-in-law, the toddler, and mine. Our grandson has his own gluten-free version.) hold the contents of 1 dozen. Here’s the recipe updated to be dairy-free and for kneading by a mixer with a dough hook, something not available in what my grandchildren refer to as “the olden days.”
Basic Sweet Roll Dough
3 1/2 to 4 cups unbleached flour (I used 2/3s whole wheat bread flour)
1 package active dry yeast
1 cup water for dairy free
1/8 cup sugar
1/4 cup lard
1 teaspoon salt
2 eggs
In large mixer bowl, combine 2 cups of flour and the yeast. In saucepan, heat water, sugar, lard, and salt until mixture is warm (just begins steaming) and lard is melted. Add to flour in the mixing bowl. Add the eggs.
Beat on low speed of electric mixer for 30 seconds, scraping sides of bowl constantly. Beat 3 minutes at high speed. Using dough hook on mixer, stir in as much remaining flour as possible. Continue mixing until dough is smooth and elastic and comes away from the bowl’s side to form a ball on the dough hook (6 to 8 minutes). Remove from the bowl and shape into a ball.
Place ball of dough in lightly greased bowl, turning once to grease surface. Cover. Let rise in a warm place until double (45–60 minutes). Punch dough down. Turn out onto lightly floured surface. Continue as directed below.
Caramel Rolls
Basic Sweet Roll Dough
3 tablespoons Earth Balance buttery vegan sticks, melted
2 tablespoons brown sugar
1 teaspoon ground cinnamon
1/2 cup brown sugar
1/4 cup butter (Earth Balance or coconut oil for dairy free)
2 tablespoons light corn syrup
Combine 1/2 cup brown sugar, 1/4 cup Earth Balance and corn syrup in a saucepan. Cook, stirring constantly until shortening is melted and mixture is blended. Distribute mixture evenly in two 9×1 1/2 round or two 8×8 square pans or one 9 x 13 cake pan.
Roll sweet dough into a 24×16 inch rectangle. Brush with melted Earth Balance. Combine 2 tablespoons brown sugar and cinnamon and sprinkle mixture over dough. Starting from long side, roll up dough jelly-roll style. Seal seam. Slice into 24 rolls.
Place rolls, cut side down, in prepared baking pans. Cover and let rise in a warm place until double (about 30 minutes). Bake at 375° for 18–20 minutes. Cool about 30 seconds. Invert onto racks covered with foil and remove pans. Makes 24 rolls.
Sign up to receive website updates and See Jane Run! book news on Gravel Road’s home page right under the picture of–you guessed it–the gravel road.


