by jphilo | Apr 23, 2014 | Recipes
Once again I’ve been on the road, which means very little time for trying new recipes. So today’s recipe comes from my cousin and fellow writer, Gary. He was a volunteer fireman in Hudson, Iowa for many years. (In fact, one of his projects was to compile and write a thorough and interesting history of the fire department.)
Before retiring, he was one of the department’s chief cooks. Recently he sent several crowd favorites to share at Down the Gravel Road. Today’s offering is the recipe he and his late wife, Maxine, cooked up. Gary says, “Maxine also helped proportion the family-sized recipe for the scalloped corn. Fire house left overs of this scalloped corn are divvied up by seniority or by lottery after fire department parties. It is really good.”
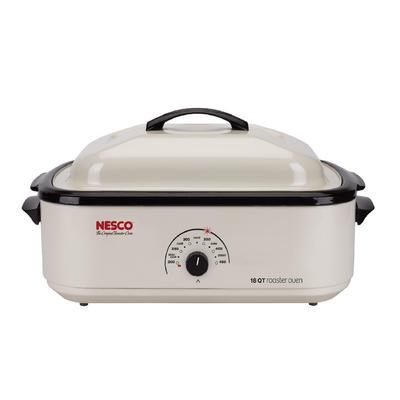
The first recipe is the family-sized version, while the second is so big it’s prepared in an electric roster and will feed an entire fire department.
Hudson Fire Department Scalloped Corn: Family-sized Version
2–14 oz. cans whole kernel corn
1–14 oz. can creamed corn
8 oz. carton of sour cream
1 box Jiffy Corn Muffin Mix
1 egg
1 stick butter
4 oz (1 cup) shredded cheddar cheese
Preheat oven to 350°. Drain whole kernel corn Mix corn, sour cream, egg and muffin mix in a bowl. Melt butter and pour into mix, and stir. Stir in cheddar cheese
Spray a 8 X 8 baking pan with cooking spray and pour mixture into baking pan. Cover with aluminum foil. Poke 4 small vent holes in aluminum foil. Bake for 1 to 1 1/2 hours or until done. Center should be firm, not soupy.
Hudson Fire Department Scalloped Corn: Fire Department Version
2-1 gallon cans whole kernel corn, drained
1-1 gallon can creamed corn
48 oz sour cream
70 oz (10 boxes) muffin mix
12 eggs
32 oz butter
32 oz cheddar cheese
Spray roaster with cooking spray. Mix the ingredients together in the electric roaster. Cover with aluminum foil. Cook at 325–350° for 2 1/2 to 3 hours. Stir after 1 hour and again after 2 hours.
At the 2 hour mark, poke 5 vent holes in the foil. Watch closely to prevent scorching. If it starts crusting on the sides, stir every half hour. Remove from roaster and let cool 30 minutes before serving.
Mix together, cover, cook at 325-350 for about 2 ½ to 3 hours. Stir after one hour and after 2 hours. After 2 hours, poke 5 vent holes in foil. Watch closely to prevent scorching. If crusting on the sides, stir every half hour. Remove and let cool 30 minutes before serving.
Photo Source
by jphilo | Apr 16, 2014 | Recipes
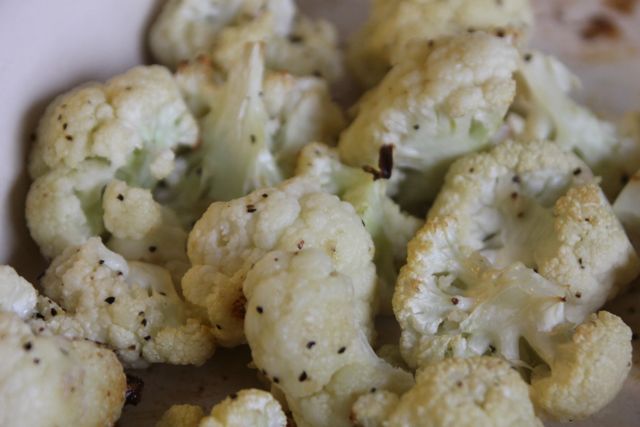
Before diving into today’s recipe, you should know that I am not a cooked cauliflower lover. I like it raw, but not steamed, mixed with broccoli, or in soup. So I was a little skeptical during a weekend visit with family when the chef said the veggie for supper was going to be roasted cauliflower. I took a small helping, took a small bite, and experienced a small epiphany.
It. Was. Delicious.
Amazingly delicious. So delicious that I bought a head of cauliflower and gave it a try myself. I only used half the head for the two of us, in case my version wasn’t as tasty as what we’d been served early. But once again, it tasted wonderful. And I have enough left to make it again very soon. Hooray! Enough with the swooning and onto the recipe. Here it is. The easiest, tastiest vegetable side dish ever…
Roasted Cauliflower
1 head cauliflower, washed and broken into florets
3 tablespoons olive oil
2 cloves garlic, pressed
1/4 teaspoon kosher salt
1/4 teaspoon coarse ground black pepper
Preheat oven to 450°. Oil a 9 X 13 casserole dish. Put cauliflower in a large bowl. Mix oil, garlic, salt and pepper together and pour over cauliflower. Mix well. Pour cauliflower into baking pan. Slide in the oven and bake for 20 minutes.
by jphilo | Apr 9, 2014 | Recipes
After a week on the road, I was happy to get home Monday afternoon. Not only to sleep in my own bed and see the Man of Steel, but also to enjoy the container of dairy-free peanut butter cookies I’d tucked away in the freezer before leaving. Knowing the cookies were waiting made it much easier to turn down the dairy-laced treats offered throughout the days away from home. (So did sipping on a Strawberry Fruit Smoothie at the Cheesecake Factory while friends enjoyed the restaurant’s signature desserts.)
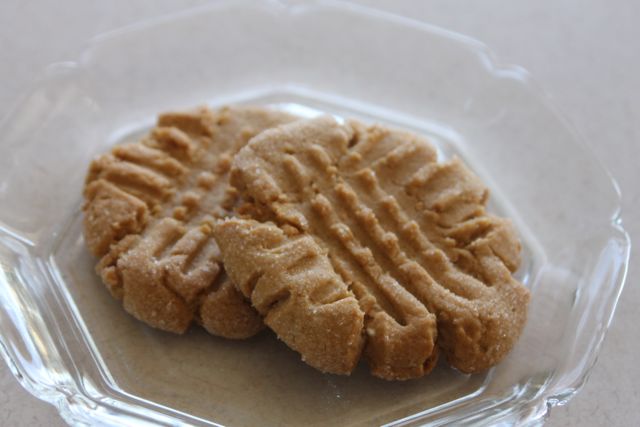
The secret to these perfectly delicious and dairy-free peanut butter cookies–no way would you know they contain no butter unless someone spilled the beans–is to use coconut oil instead of butter or margarine. The coconut oil lends the same texture and crisp lightness butter does. So give this version of recipe, originally found at Country at Heart Recipes, a try and leave a comment about how it worked for you.
Non-Dairy Peanut Butter Cookies
1 cup coconut oil, room temperature
1 cup chunky peanut butter
1 cup brown sugar
2 eggs
1 teaspoon vanilla
3 cups flour
2 teaspoons baking soda
1 teaspoon baking powder
1/2 teaspoon salt
1/2 teaspoon cream of tartar
Preheat oven to 350°. If using baking stones, put them in oven to heat. In mixing bowl cream shortening, peanut butter, brown sugar, and eggs with an electric mixer until ingredients are fluffy. Add vanilla, baking soda, baking powder, salt, and cream of tartar. Mix well. Add dry ingredients and mix well, scraping down sides as necessary.
Roll dough into walnut-sized balls. Roll in granulated white sugar. Place on ungreased cookie sheet or heated baking stones. Make crisscross indentation with a fork. Bake for 10 minutes until golden around the edges. Makes about 4–5 dozen. (I put 1 stone of unbaked cookies on bottom rack of oven for 5 minutes. Then I turn the stone around and place it on the top rack and put a new stone of unbaked cookies on the bottom rack. Bake for 5 more minutes, take the first stone out, move the second stone up, and place a new unbaked stone on the bottom rack, repeating the steps until all the cookies are baked.)
by jphilo | Apr 2, 2014 | Recipes
One cooking puzzle I’ve never been able to solve is how to achieve the perfect marinara sauce to pasta ratio. My tendency is to overdo the pasta, which means that 9 out of 10 times we have left over spaghetti noodles. If it’s just a little bit, we throw it away. But recently, I made way too much. So much that my guilty conscience kicked into high gear at the thought of wasting so much food.
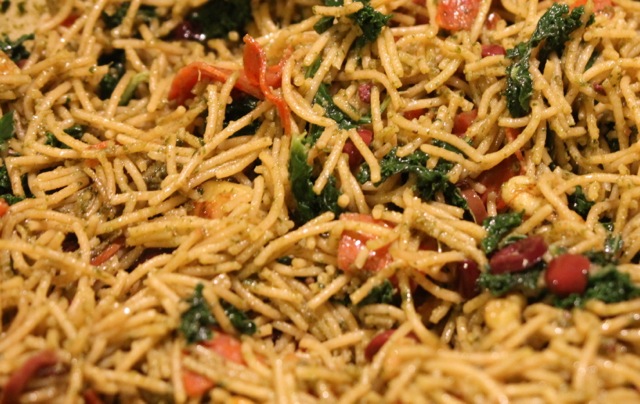
Therefore, I did the logical thing and created a new recipe to make good use of the leftovers. The resulting meal was a big hit and received the coveted Hiram Seal of Approval. It is dairy-free and versatile, as the cook can add or substitute ingredients, especially the veggies, depending on what’s available.
Basil Pesto Pasta
12 ounces cooked spaghetti noodles
3 tablespoons olive oil
1/2 cup walnuts pieces (or use pine nuts or almonds)
1/2 cup basil pesto
1/3 cup red sweet pepper, chopped
1/2 cup onion, chopped (optional)
1 cup kale, torn into small pieces (or use broccoli, green beans, or cauliflower)
1/2 cup kalamata olives, sliced
1/2 cup thin-sliced pepperoni, each slice quartered
Heat oil over medium heat in large, heavy pan. Add walnuts and stir fry for 2 minutes or until they begin to brown slightly. Remove with a slotted spoon and drain on paper toweling.
Add vegetables and stir fry until hot, but still fairly firm. Add cooked pasta and stir well until coated with oil. Add the pesto and stir until the pasta is evenly coated. (This takes patience!) Add olives, pepperonim and nuts. Stir for another minute. Serve immediately. Sprinkle with feta or Parmesan cheese if desired.
by jphilo | Mar 26, 2014 | Recipes
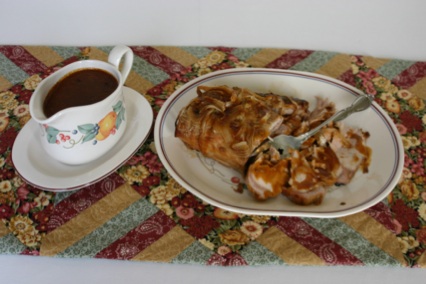
This recipe has been a family favorite since the first year Hiram and I were married. We found it in the cookbook that came with the crock pot we received as a wedding present in 1977. This pork roast recipe receive the coveted Hiram seal of approval long before the award was invented. It’s easy, delicious, and wows people at dinner parties. Without further ado, here’s one of my all time favorite recipes.
Oriental Pork Roast with Gravy
2 – 3 pound pork roast 1 small onion, thinly sliced
1/3 cup soy sauce 1 clove garlic, minced
Place pork roast in crock pot. Pour soy sauce over roast. Sprinkle roast with minced garlic. Arrange sliced onion on top. Turn crock pot on low setting and cook for 8 – 10 hours. Twenty minutes before serving, lift roast onto a serving platter. Slice meat and cover it to keep it warm.
To make gravy, pour drippings into a measuring cup. Skim off fat. Add water to drippings until you have 1 ¾ cups of liquid. Put liquid in a saucepan. Blend together 1/3 cup flour and ½ cup water. Slowly add flour mixture to liquid in the saucepan. Heat, stirring constantly, until liquid comes to a rolling boil. Turn down heat and let it boil gently for a few minutes. Pour into a gravy boat and serve with the meat.
by jphilo | Mar 19, 2014 | Recipes
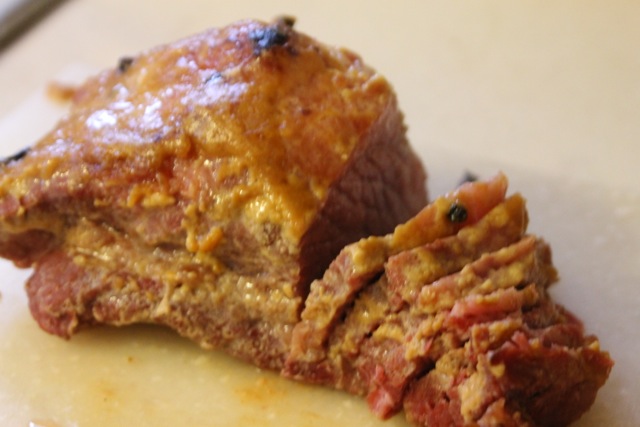
Apologies and more apologies for posting this recipe for Baked Corn Beef two days after St. Patty’s Day. But since the dish received the coveted Hiram Seal of Approval, I’m posting it now instead of waiting until next year.
Corn beef with cabbage is not my favorite meal, at least not the boiled version. (It’s a texture thing.) But this baked version, found at the Simply Recipes website, was very, very good. Good enough that when corn beef was on sale last week, I picked up a couple packages and froze them for future use.
Baked Corn Beef
3 pounds corn beef
10 whole cloves
1/4 cup sweet, hot honey mustard
2 tablespoons brown sugar
Preheat oven to 350°F. Take the corned beef from the package and discard the spice packet. To reduce the salt content, place meat in a pot fat side up. Cover with water, bring to a boil on top of the stove. Discard the water, add fresh water and bring to a boil again. Again discard the water.
Lay the corned beef, fat side up, on a large piece of heavy duty, wide, aluminum foil. Poke the cloves into the top of the slab of corned beef, evenly spaced. Spread the top with the hot sweet honey mustard. Sprinkle with brown sugar.
Wrap the corned beef with foil so there’s space between the top of the corned beef and the foil. This creates a way for the foil to catch the juices. Place foil-wrapped corned beef in a shallow roasting pan and bake for 2 hours.
Fold back the foil from the top, spread a little more honey mustard over the corned beef, and broil it for 2-3 minutes, until the top is bubbly and lightly browned.
Let rest for 5 to 10 minutes on a cutting board. Pull out cloves and discard. Cut the meat at a diagonal across the grain into 1/2-inch thick slices. Serve with sauteed cabbage.
The recipe for sauteed cabbage, as well as traditional boiled corn beef and cabbage can be found at Simply Recipes Corn Beef and Cabbage. Luck o’ the Irish to ya!