
by jphilo | Feb 10, 2016 | Recipes
 During our last visit to see the grandkids, the cook served the most delicious pulled pork. The Man of Steel raved over it so much I had to asked for the recipe and was directed to the 100 Days of Real Food website. That’s where I learned that the recipe for crock pot pulled pork was low in sugar and had no preservatives. Plus it was easy, and has been mentioned before, had already received the coveted Hiram Seal of Approval.
This makes a large batch. We ate some, saved some for left overs, and froze the rest for another meal in a couple weeks.
Crock Pot Pulled Pork
- 3 tablespoons paprika
- 1 tablespoons salt
- 2 teaspoons black pepper
- ½ teaspoon cayenne pepper
- 1 teaspoon garlic powder
- ½ teaspoon dried thyme
- ½ cup honey
- ¼ cup red wine vinegar
- 3 tablespoons olive oil
- 1 onion, peeled and cut in half
- 3 to 3 ½ pounds pork shoulder, cut in half
- In a bowl, mix the dry spices together with a fork.
- Add the honey, vinegar, and olive oil and stir until smooth.
- Place the onion in the bottom of the crock pot Top it with the 2 pieces of pork and then pour the spice mixture over every side of the meat.
- Turn the slow cooker on to low and cook for 6 hours or until the meat is tender enough to be easily shredded with a fork.
- Remove the meat from the crock pot and place in a pan to cool. Once it has cooled, shred the meat and return it to the liquid in the crock pot.
- Serve warm on buns. For a side dish try fresh spinach salad.
by jphilo | Feb 3, 2016 | Recipes
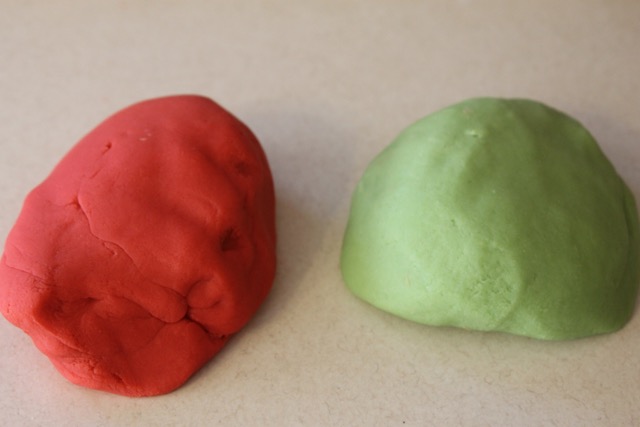
 We went to see the grandkids last weekend and had a blast, as usual. We spent part of our time making scented play dough in an effort to beat the winter blues. Here’s the recioe, just In case you’re looking for something to wile away the long winter days that keep kids cooped up inside. This recipe first appeared on Gravel Road about a year ago…just before my grandson and I made our first batch together.
The recipe also makes a big batch, so we put half the ingredients in one saucepan and the other half in another. Then we added a package of Koolaid to each pan and cooked one panful and then the other. Last weekend, we made yellow, green, purple, and orange, enjoying ourselves immensely.
Scented Play Dough
Ingredients:
2 cups flour
2/3 cup salt
4 teaspoons cream of tartar
2 packages unsweetened Koolaid
2 tablespoons oil
2 cups water
Directions:
Mix the dry ingredients together in a sauce pan. Then add the oil.
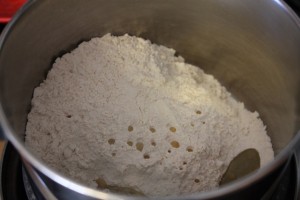 Add the water, about a quarter cup at a time, whisking as you go. Keep whisking until all the lumps are gone.
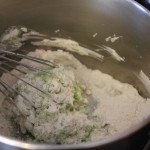
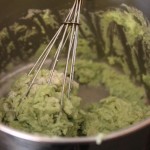
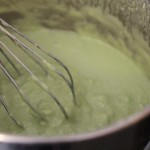 Cook over medium heat, stirring constantly and scraping the bottom of the pan frequently…
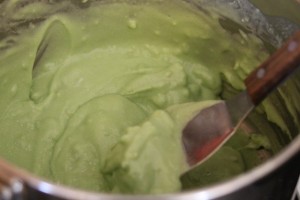 ….until the dough stops sticking to the side of the pan.
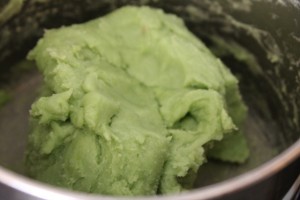 Let the first half-batch cool while you make the second. Then, turn the first batch onto the counter and knead a few times. Once the second batch cools, do the same thing again.
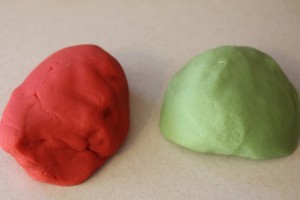 It is very, very important to play with the dough as soon as it’s cool enough. You don’t want to miss the sensation of warm, juicy-smelling dough squeezing through your fingers, do you?

by jphilo | Jan 27, 2016 | Recipes
 What’s better on a cold winter day than snuggling in a chair with a cup of hot chocolate while watching the snow fall? This version of an instant hot chocolate mix from the Live Simply website is dairy-free and delicious. It’s also very easy to make and keeps well.
Non-Dairy Hot Chocolate Mix
1/3 cup brown sugar
1/2 cup Kirkland chocolate chips
1/2 cup unsweetened cocoa powder
1 vanilla bean, scraped
Put the brown sugar, chocolate chips, cocoa powder, and vanilla scrapings in a food processor or blender. Pulse until the chocolate chips have been ground into a fine powder.
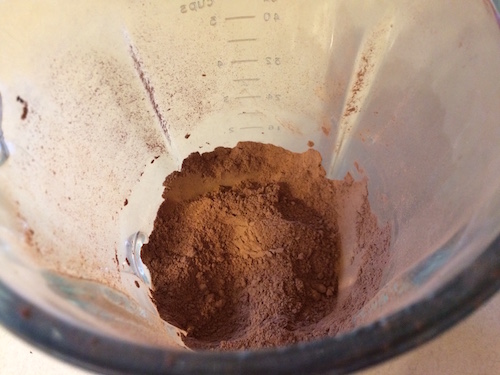 Pour into a glass jar (place the vanilla bean husk in the jar first), cover, and store in the refrigerator.
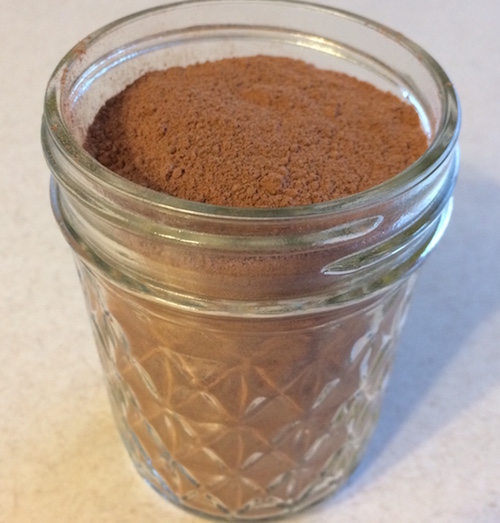 To use, warm 1 cup of milk or nut milk.* Add 3 tablespoons** of hot chocolate mix to the warm milk and stir.
* I prefer half nut milk and half strong coffee so it’s not quite so rich.
**3 tablespoons makes a very thick drink. Start with less and add more to taste.
by jphilo | Jan 20, 2016 | Recipes
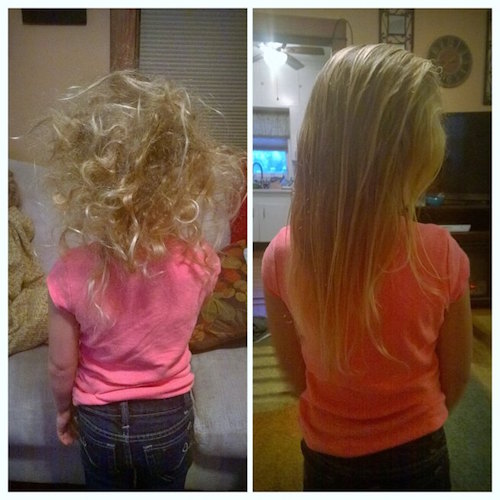
 Today’s recipe comes from a highly creative new blogger, who happens to be a rellie. At her website, I Should Blog About That…, my cousin’s daughter, Haley, writes about her life as the mother of two sets of twins. Yes, you read that right. Two sets of twins. The older set are two girls with the same curly blond hair their mama (and her mama) had as young children. Here’s Haley’s post about how she tamed their tangles by creating her own natural detangling spray.
Taming the Nest
Every morning, one of my older girls wakes up to this:
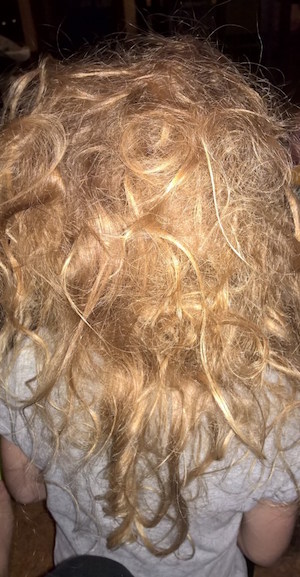 Ever since she was a baby, she has thrashed her head wildly back and forth to fall asleep. We haven’t discussed it with her pediatrician in a couple of years, so we will be revisiting it soon…but for now, the issue at hand is what it does to her hair. Her habit couples with her fine, yet curly, long hair to create a perfect storm–a hair hurricane of sorts. No special detangling brush or store bought detangler has come close to helping.
I’ll hand it to her…she doesn’t often complain while I tug her neck out of joint. Every now and then tears spring up, but she doesn’t cry. I try to be gentle. It has taken up to 15 minutes, and she has snapped two combs and a brush in half. We tried braiding it, but that just leads to a ratted braid, which adds a whole new element of difficulty–like leveling up or entering boss mode. For a long time I was making my own detangler by adding a tablespoon of an all natural conditioner to 12 oz of hot water. It worked pretty well:

But I couldn’t help but wonder if there was a truly homemade, all natural detangler that would work for her. A lot of the recipes that I researched online suggested marshmallow root or grapefruit seed extract. I also learned while researching oils that apricot and jojoba are good for dry and fine hair. So I decided to try out my own concoction. (Bear in mind, I am no biologist, or chemist, though I do get geeky pleasure out of those disciplines–all of my choices are based on my own research and only my opinion on this detangler’s effectiveness is expressed here.)

Let me start by breaking down the ingredients to illustrate their benefits and why I chose them:
Marshmallow Root: When simmered, it produces a gel-like substance that coats surfaces. This property is also what purportedly makes it a wonderful digestive supplement (I haven’t tried it, but the more I learn, the more interested I become). It made it an obvious starting point as a detangler. The capsules I bought were easy to open and dump into the pot.
Aloe Vera Gel: If you are picturing that neon green bubbly looking substance sold cheap for sunburns, think again. I mean the actual gel extracted from the Aloe Vera plant and left in its natural state. It can actually be taken internally (I’ve tried it in the form of Organic Aloe Vera drinks–it’s…interesting. Not bad, just different.) It works much the same as the marshmallow root for digestive systems. It is loaded with nutrients and amino acids, is deeply absorbable by the skin (think scalp benefits), and is structurally similar to the keratin found in hair. As with the marshmallow root, its natural “slippery” nature lends it wonderfully to detangling.
Grapefruit Seed Extract (GSE): Well, this stuff is simply loaded with antioxidants and phytonutrients. It has more uses than I can possibly list, including being antiviral, antifungal, antiseptic, alkalizing, and a natural preservative. Every site and source that I read up on mentioned more and more benefits. For my hair purposes, GSE actually cleans and adds shine as well as helping detangle.
Apricot Oil: This oil is rich in vitamins A and E and is easily absorbed. This made it a fairly easy choice to add.
Jojoba Oil: This oil is similar in structure to sebum, the oil naturally produced by the scalp. It is easily absorbed and is also an emollient, which means it fills in smalls cracks in the hair follicles to create a stronger length.
Vitamin E: Is also a strong antioxidant that helps protect and stabilize cells. It is also a natural preservative.
Finally, I chose Orange and Vanilla essential oils for scent…mmmmmm, Orange Julius…
*Note* I do NOT use fragrance oils–you will see a recurring theme in my recipes that strongly disagrees with the use of fragrance oils in products labeled “natural” and/or “organic”, as fragrances are artificially manufactured scents that contain artificial ingredients and are meant to mimic real scents–plus, I am allergic to most of them. While fragrances are less costly and can smell nice, I choose not to use them in my products. You have to make that call for yourself.
I started by bringing the marshmallow root and 8 oz of water to a boil, then reduced to a simmer for 20 minutes. Some sites suggested boiling up to 30 minutes, but no matter the time, the goal was the same: create a gel. After I removed it from the heat, I strained it through cheesecloth placed in a mesh strainer. I tried a coffee filter first, but that would have taken hours, if it worked at all. I let it cool slightly so I didn’t risk damaging the integrity of the oils when I added them.
I stirred in the additional ingredients with a silicone spatula…coincidentally making a heart in the center–shoulda been a barista. Ha! Finally, I added the mixture to a spray bottle (use one with a larger diameter tube; a spritz pump will not work with the thicker mixture) and finished it with 12 more oz of water. To be the most beneficial, I assume distilled water would be best; I just boiled mine.
Then I put that nest to the test. And, it worked! Very well, in fact. I even applied it to dry hair, and it didn’t leave any crunchy or oily residue. I’m pretty happy with the results, and my daughter is, too. It also worked well on her twin sister’s hair to tame frizzies and fly-aways.
Hair Detangling Spray:
2 tablespoons marshmallow root powder*
8 oz of water + 10-12 more oz to thin mixture at the end
1 teaspoon Aloe Vera gel
1/4-1/2 teaspoon jojoba oil (I used 1/4)
1/4-1/2 teaspoon apricot oil (I used 1/2)
10 drops GSE
5 drops Vitamin E oil
10-12 drops essential oil(s) of choice
*The reason I list the oils 1/4-1/2 teaspoon is to try to illustrate that adjusting these amounts is easy. In fact the whole recipe is flexible! Just as no shampoo works for every hair type, no single product works the same for everyone. Those with dryer, thicker, or more course hair may wish to try the higher measurement of oil, while those with thin or naturally oily hair may wish to use the lesser amount. I hope that you find the combination that works for you!
If you’re feeling adventurous, give your own detangler a shot! If you don’t want to keep specialty ingredients on hand, try the conditioner/water trick–just refill your store bought detangler bottle the next time it runs out, and you truly will have nothing to lose but the cost of one tablespoon of conditioner and 2 minutes of your time.
*If you can get a hold of the loose leaf marshmallow root to boil, it will reduce sediment in the final product since it can be more fully strained out after boiling. I couldn’t get a hold of any for this tutorial, which is why the recipe originally states “marshmallow root powder” as I used.
by jphilo | Jan 13, 2016 | Recipes
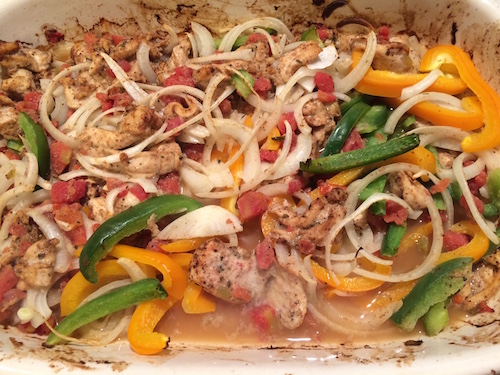
 The test kitchen at our house is is officially open for 2016. The first offering of the season isoven-baked fajitas. The recipe, which is making the rounds of Facebook, is low fat, chock full of veggies, and contains no diary. When served on warm tortillas, however, the Man of Steel can top his with sour cream and cheese, and I can garnish mine with refried beans and guacamole. We really liked it. See what you think!
Oven Baked Fajitas
1 pound boneless, skinless chicken breasts, cut into strips
2 tablespoons vegetable oil
2 tsp chili powder
1 1/2 tsp cumin
1/2 tsp garlic powder
1/2 tsp dried oregano
1/4 tsp seasoned salt
1 (15 oz) can diced tomatoes with green chilies (Rotel)
1 medium onion, sliced
1/2 red bell pepper, cut into strips
1/2 green bell pepper, cut into strips
Preheat the oven to 400 degrees. Place chicken strips in a greased 13×9 baking dish. In a small bowl combine the oil, chili powder, cumin, garlic powder, dried oregano, and salt. Drizzle the spice mixture over the chicken and stir to coat. Next add the tomatoes, peppers, and onions to the dish and stir to combine.
Bake uncovered for 20-25 minutes or until #chicken is cooked through and the vegetables are done. Serve on warm tortillas. Spread the tortillas with refried beans, if you wish, add the meat mixture, and garnish with your favorite toppings.

by jphilo | Jan 6, 2016 | Recipes, Reflections on the Past
 Today’s recipe comes compliments of my sister. She passed it along a year or so ago and reading it reminds me of how easy life is today compared to the lives of our grandparents and their grandparents. I haven’t tested this recipe, and don’t plan to. But if you take a crack of it, come back after you’ve had a few days to recover and leave a note about how it worked for you.
Grandma’s Washing Receipt
- bild a fire in the back yoard to heet kettle of rain water.
- set tubs so smoke won’t blo in eyes if wind is pert.
- shave one hole cake soap in bilin water.
- sort things, make three piles: 1 pile white, 1 pile collord, 1 pile work britches and rags.
- stur flour in cold water to sooth then thin down with bilin water.
- rub dirty spots on board, scrub hard. Then bile. Rub cullord but don’t bile—just rench and starch.
- take white things out of kettle with broom stick handle then rench, blew and starch.
- spred tee towels on grass.
- hang old rags on fence.
- pore rench water in flower bed.
- scrub portch with hot soapy water.
- turn tubs upside down.
- go put on cleen dress—smooth hair with side combs—brew cup of tee—set and rest and rock a spell and count blessins.
This is an authentic washday ‘receipt” in its original spelling as it was written out for a bride in 1900. Donna Barlass, Church Cookbook, Lenark Illinois

 During our last visit to see the grandkids, the cook served the most delicious pulled pork. The Man of Steel raved over it so much I had to asked for the recipe and was directed to the 100 Days of Real Food website. That’s where I learned that the recipe for crock pot pulled pork was low in sugar and had no preservatives. Plus it was easy, and has been mentioned before, had already received the coveted Hiram Seal of Approval.


